Legend of Zelda was easily my most favorite video game as a child. Our kids like watching us play the new versions and for my son's birthday party we are using Legend of Zelda as our theme.
Here is what we did with notes on what worked. First off I am glad we didn't get all 8 kids we invited. We had four 10 year old kids with a few siblings ranging from 5 to 12. To top it off my throat got sore and I could barely talk. Luckily, I had two other adults stay plus my husband and my mom available to help.
The invitation used the original Legend of Zelda opening scene. We used the print screen function on the computer to save the image and my husband used Adobe Photoshop to mess around with it.
It is really easy to find Legend of Zelda images using Google.
Inside the invitation is where I got creative:
YOU ARE INVITED TO
JOIN OUR QUEST
FOR (insert child's name)
BIRTHDAY PRESENTS
AND THE TRIFORCE
CAKE ON
(insert Date)
(insert Time)
COME TO HYRULE AT
(insert Address)
RSVP (insert your number)
Using the
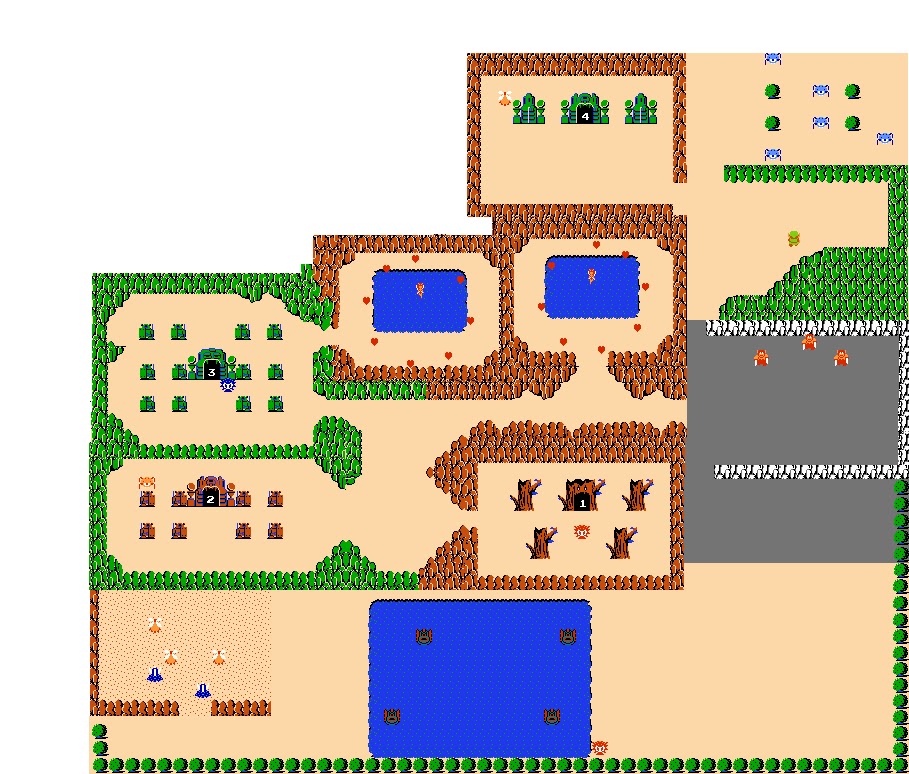
original Hyrule Map I created a map of our house using Paint to cut and paste. My plan was to make a level out of each room and present a challenge to be conquered.
was a printed maze that our printer makes randomly. We made several and wrote a 1, 2, and 3. There are several unused drawers in my daughter's room so the kids worked their way through the maze to each number and allowed them to open a drawer as they reached it. The kids really liked the idea. The items they got were a key and 2 flashlights.
Level 2 was a dark room (in another bedroom). The kids used a flashlight to find the chest hidden in the room. It contained small balloons filled with air and attached to curling ribbon. The instructions were to tie a balloon around the ankle and go to the living room for the monster stomping game. The rules of the game was to pop everyone else's balloon with your feet and try to avoid their feet popping your balloon. The kids liked the game a lot so we did it twice. A couple kids that didn't like the popping sound covered their ears or just watched and waited for the next game.
Level 3 was in another bedroom. We set up a Jenga tower with 3 blocks marked with a key, a compass and a chest. We played with Jenga rules, building the tower as we pulled out blocks. When the tower fell, they had to start over again (like dying in the game). When the kids found all 3 blocks they have beaten the level. Unfortunately, not all the kids were patient with this game. I had to tell one to back off because he kept knocking over the tower when it wasn't his turn. I also took away some of the dud blocks so it was easier to find the right ones after a few tries. Once they succeeded they opened the chest in the room and found boomerangs (purchased for 50 cents a piece at
Party City) and 2
sling shots I found at the Dollar tree. We supplemented the sling shot ammunition with a package of table tennis balls. (I think my husband found them at Albertson's).
Level 4 was in the Garage. We had a good battle idea. Paper bats hanging from the ceiling. My husband took over this idea and taped the bats to string and hung them from the rafters. He used Halloween decorations and scattered storage tubs around the room to add decor and difficulty. His goal was to use the boomerangs and slingshots to knock the bats down, but tape was stronger or the paper wasn't heavy enough. Either way the kids finally knocked them down when they climbed on the boxes and hit the bats with their boomerangs melee style. He also added to the difficulty by requiring the flashlights to be used again but eventually had to turn on a lamp anyway. We had to use our daughter's toy box to hold the last treasures also purchased at the dollar tree:
water shooter tubes and
beach balls.
(Edit: I noticed in October the 99 cent store sold squeaking rubber bats that hang. So cool, I just had to share that if you plan ahead you can get better than paper.)
This game had to be played in the backyard. I thought the water shooter tubes looked a lot like arrows. The Classic game included killing Gannon with silver arrows. So the way I thought to incorporate them was to have a race. The kids would spray the beach balls across the yard. Theoretically, it was a great idea and the kids took turns racing and enjoyed it. But, I didn't have enough voice to keep it organized. At that point they were all just having a good time anyway. In my mind, I was going to have them team up and do a relay and work together, but taking turns racing each other in pairs worked too.
The climatic event really was the
Dragon Pinata from Party City. If I had more time we could have made one but this worked great. My husband used a flag pole and our porch railing was a fulcrum so he could move it around to "attack" the kids. It was quite amusing to watch and the triumphant finish was perfect as the dragon was beheaded. We filled it with Jolly Ranchers because it resembles rupees pretty well.
We had gathered all the gifts out in the backyard as the Dragon's hoard and we proceeded to watch our birthday boy open his presents. The Triforce cake was presented by my husband. He used a baking sheet and two cake mixes, but it allowed him to create 3 equilateral triangles. After that the kids just wanted to play with each other so ends my tale.
I had a lot of great ideas I did not get to use because of a lack of time to prepare, but for what we accomplished I put this party down as a great success. Feel free to use any of the ideas I have described.
Other things I considered doing in no particular order:
Setting up the food table like a potion shop.
Giving the kids rupees (as jolly ranchers or paper rupees or something) to spend on the games or other places.
Giving the kids each a Link hat to wear and a "heart container."
Using water balloons as "bombs" to aim at a large picture of a Classic Legend of Zelda monster.
Drawing a picture of Gannon on the beach ball.
Incorporating finding the piece of triforce in each level.